Caricatures have long been cherished for their ability to capture the essence of a subject while infusing humor and exaggeration. Traditionally created by talented artists with pen and paper, modern technology now allows us to bring these hand-sketched caricatures to life in the digital realm. In this blog post, we will explore the different ways to transition from paper caricatures to digitally hand-drawn masterpieces using popular software like Photoshop and Procreate. So, let's embark on this exciting journey from "photo to caricature" and explore the creative possibilities digital tools offer!
- Scanning the Hand-Sketched Caricature:
The first step in converting a hand-sketched caricature to a digital format is scanning the original artwork. Use a high-resolution scanner or a smartphone with scanning capabilities to ensure the final digital version retains all the intricate details and shading present in the physical drawing. Save the scanned image as a high-quality file, such as JPEG or PNG.
- Cleaning and Preparing the Scan:
Once the caricature is scanned, it's essential to clean up the image in Photoshop or Procreate. Use the software's editing tools to remove any unwanted marks, smudges, or imperfections that may have occurred during the scanning process. Additionally, adjust the levels, contrast, and brightness to enhance the clarity of the image.
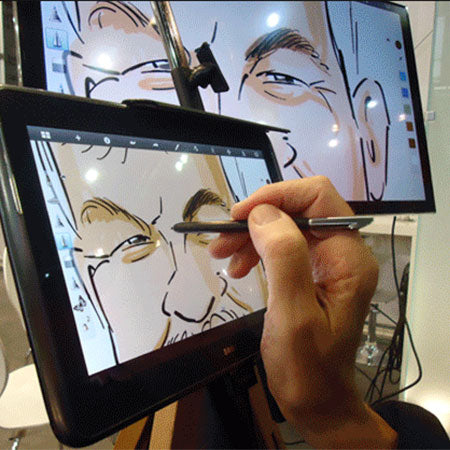
- Outlining and Inking:
To create a digital caricature, artists need to outline and ink the scanned image. In Photoshop, you can create a new layer on top of the scanned image and use various brush presets to trace the caricature's contours. Procreate offers a similar feature, allowing you to create a new layer and start inking with a stylus or Apple Pencil. This process helps maintain the original hand-drawn feel while preparing the artwork for colorization.
- Adding Color and Texture:
The next step is to add color to your caricature. With digital tools like Photoshop and Procreate, artists can experiment with an array of colors, brushes, and gradients to breathe life into their creations. The "photo to caricature" transformation allows for an unlimited range of color combinations and special effects to enhance the overall impact.
- Emphasizing Features:
Caricatures are known for exaggerating specific facial features to create humor and uniqueness. Utilizing digital tools provides artists with precise control over feature exaggeration. With the ability to zoom in, artists can meticulously emphasize distinct characteristics, such as prominent noses, ears, or eyebrows, making the caricature instantly recognizable and entertaining.
- Adding Background and Elements:
In the digital realm, artists can easily incorporate custom backgrounds and additional elements to enhance the overall composition. These backgrounds can complement the subject's personality or set the scene for a specific narrative. The flexibility to experiment with different background styles enriches the caricature and adds depth to the artwork.
- Exporting and Sharing:
Once the digital caricature is complete, it's time to export it as a high-resolution file. Both Photoshop and Procreate offer various file formats suitable for sharing online or printing. JPEG, PNG, and PSD formats are popular choices for digital sharing, while TIFF is excellent for printing.
The transition from hand-sketched caricatures on paper to digital masterpieces using Photoshop or Procreate opens up a world of creative possibilities. The "photo to caricature" journey lets artists maintain the essence of traditional caricature art while harnessing the advantages of digital tools. With the ability to experiment with colors, textures, and backgrounds, artists can produce visually stunning and humorously engaging caricatures that are sure to captivate audiences worldwide. So, whether you're a seasoned artist or a budding caricaturist, embrace the digital era to bring your caricatures to life like never before!